Showing posts with label Simulasi. Show all posts

Saturday, 11 March 2023

Tutorial: VB.Net S7-PLC Client

- 0 komentar

 This tutorial shows you how to create an application that can read and write to a Siemens S7-PLC.

We use Visual Studio 2022, with Visual Basic and WinForm .Net Framework type project.


These are the steps:

00:00 - Create VB WinForm Project

08:19 - Scripting

16:37 - Test with S7-PLC DB Simulator


The S7DBSim application can be downloaded from this link:

https://youtu.be/ZGsIwFcajUE


Thank you, and have a nice day!

[Continue reading...]

Sunday, 10 May 2020

Video Tutorial : VB Modbus SCADA with AdvancedHMI

- 0 komentar


Introducing AdvancedHMI to build SCADA (Modbus TCP Client) application in Visual Studio. I do not share the project files, because i think if you follow the steps in video then you can practice and learn better. Thank you.

[Continue reading...]

Saturday, 9 May 2020

Video Tutorial : VB Modbus SCADA House Monitoring

- 0 komentar


How to make SCADA application for House (Simulation) please see the previous video here: https://youtu.be/GMceNxKlq-w TimeSteps: 00:04 Form Modification 09:25 Coding 14:50 Test I do not share the project files, because i think if you follow the steps in video then you can practice and learn better. Thank you.
[Continue reading...]

Tuesday, 5 May 2020

Video Tutorial : VB Modbus TCP Client to MySQL Database

- 2 komentar


Please see the previous video :
Visual Basic Modbus TCP Client
http://hadiscada.blogspot.com/2020/05/video-tutorial-visual-basic-modbus-tcp.html

This video is the advanced step, now we will do monitoring Modbus TCP data then logging to MySQL database.


TimeSteps:
00:04 Form Design
05:50 Setup MySQL Database and Table
07:58 Scripting
17:50 Test


The project source code can be downloaded here:
https://drive.google.com/open?id=1Cv8CU8a_tDqLM3YimtGDiuwmxWwJJ-3m


Thank you.
[Continue reading...]

Monday, 4 May 2020

Video Tutorial : Visual Basic Modbus TCP Client

- 0 komentar


This video shows How to create Modbus TCP Client desktop application using Visual Basic language in Microsoft Visual Studio 2019. In this project we will add EasyModbus library using Nuget Package Manager.
and we will use Mod_RSsim Modbus Simulator, can be downloaded from here: http://www.plcsimulator.org/downloads The project source code can be downloaded here: https://drive.google.com/open?id=1hIRpKCkbE_i5zxXpqpNKh4p6xr8XKLd-


Thank you.
[Continue reading...]

Thursday, 25 April 2019

Excel SCADA : Membuat SCADA di Microsoft Excel

- 4 komentar

Membuat SCADA di Microsoft Excel

Apakah Excel bisa digunakan untuk menampilkan data-data SCADA/HMI ?
mari kita coba bersama.. langkah-langkahnya seperti ini:
1. membuat aplikasi EXE,
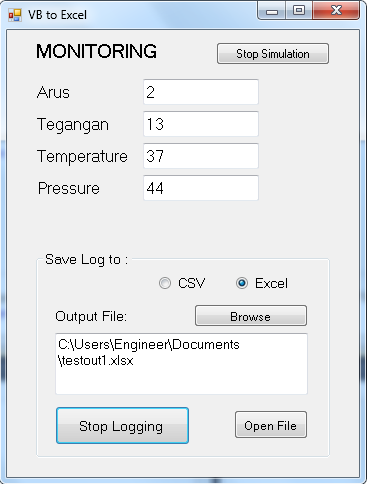
untuk membaca data-data dari alat/device. Pada percobaan kali ini kita akan membuat projek WinForm VB, dan koneksinya adalah ke Modbus TCP server (simulator). Hasil pembacaan data akan ditulis ke File Text.
2. membuat file Excel,
untuk menampilkan SCADA nya.
3. membuat script VBA di Excel,
untuk memanggil aplikasi EXE yang sudah dibuat dan secara periodik membaca file Text outputnya lalu mem-plot data-data ke Sheet Excel.

Baiklah mari kita mulai..

Untuk point 1 kita bisa pake library EasyModbus.. contoh projeknya seperti ini:
http://hadiscada.blogspot.com/2019/02/modbus-tcp-client-and-logger-csv.html

tapi untuk praktek kali ini kita tidak akan membuat Logger tapi Realtime data, jadi ada perbedaan di file outputnya, kalau Logger datanya Growing (bertambah terus) sedangkan untuk praktek kali ini datanya tetap, hanya Value-nya saja yang berubah-ubah sesuai pembacaan saat itu (Realtime data).

aplikasi yang akan kita buat harus bisa dipanggil oleh aplikasi dari luar, misal dari Command Prompt (DOS), artinya aplikasi harus punya parameter-parameter yang bisa disesuaikan.. misalnya seperti ini:
kita ingin membaca Modbus TCP di IP 127.0.0.1, dengan list address pada file "D:\addressku.txt" dan output file ada di "D:\dataku.txt"

maka aplikasi harus bisa dipanggil dengan paramater misal seperti ini :
D:\Mod2File.exe 127.0.0.1 "D:\addressku.txt" "D:\dataku.txt"

jadi jika suatu saat kita ingin menambah item yang ingin dibaca maka tinggal tambah di file Text saja.

Membuat aplikasi VB
oke, kita mulai buat aplikasinya.. saya kasih nama Mod2File.exe
kita pake Visual Studio 2010 Express saja, dengan bahasa VB.
di Form-nya cukup tambah objek Timer saja.


di Properties projek nya, bagian Debug, saya isi parameter spt ini, itu maksudnya adalah untuk konek ke Modbus TCP yg ada di localhost (IP: 127.0.0.1) dengan file "addressku.txt" berisi list alamat register yang akan dibaca, dan file "dataku.txt" sebagai output untuk menyimpan nilai/data. angka "5" adalah interval pembacaan data, dalam detik.


Parameter diatas sebetulnya tidak perlu ditulis juga tidak apa-apa.. nanti parameter tersebut akan dikasih dari pemanggilnya (CMD / Excel).

.... skip bagian programming ...

oke, aplikasi sudah selesai.
*pagi pembaca silahkan download file projeknya (link ada di akhir artikel ini), lalu buka.

Test aplikasi
Sekarang mari kita isi file address, seperti ini:


selanjutnya jalankan aplikasi Modbus Simulator, saya pakai Mod_RSsim.
lalu kita tulis nilai di register-register yang akan kita baca,


jalankan projek VB nya
setelah aplikasi dijalankan maka file output ("dataku.txt") akan otomatis dibuat, dan isinya adalah value dari setiap address, seperti ini:


Test dari CMD 
Sekarang mari kita coba panggil Mod2File.exe dari Command prompt..
tutup dulu Visual Studio nya, lalu copy file "Mod2File.exe" dari folder Debug projek. copy juga file DLL "EasyModbus.dll", paste di D: saja biar simple.


sekarang buka Command prompt atau CMD, dan ketik seperti ini:
D:\Mod2File.exe 127.0.0.1 "D:\addressku.txt" "D:\dataku.txt" 5

maka aplikasi Mod2File akan dijalankan dan mulai membaca register Modbus dan meng-update file output secara periodik.

Membuat file Excel
oke. sekarang lanjut ke Excel.
Buka Microsoft Excel, saya pake yang versi 2007. buat blank workbook.


Buatlah tampilan HMI nya, seperti ini saja:


nanti nilai-nilai nya akan tampil di masing-masing kotak Register.
untuk membuat kotak-kotak diatas bisa pake teknik Merge cell, atau tidak pake juga tidak apa-apa, yang penting nanti adalah "Name" nya.
Untuk semua kotak yang akan diisi data, klik kanan lalu "Name a Range.."


beri nama "_REG1" dan seterusnya sesuai urutan


tambahkan sebuah tombol Start untuk triger Start/Stop pembacaan data..
*cara menambahkan tombol silahkan cari tahu sendiri ya..


Membuat VB Script di Excel
buka jendela VB/Macro editor.
*cara membuka jendela macro editor silahkan cari sendiri ya..

buat script di bagian "ThisWorkbook"


klik kanan di VBAProject lalu tambahkan Module, dan isi script berikut


Save file sebagai .XLSM
lokasi filenya simpan saja di D: agar gampang.


Test dari Excel
oke, pastikan aplikasi Modbus Simulator masih berjalan.
sekarang buka Sheet1 dan coba klik tombol Start

jika data tampil pada kotak-kotak register dan nilainya sama dengan nilai pada Modbus Server berarti kita berhasil..


Horee..!


Tambahan:
untuk contoh menampilkan data Bit / Boolean, tambah address Digital Input Register di file addressku,

<gambar>

di Sheet2, gambar HMI yg diinginkan.. lalu edit sedikit script di VBA Excel nya.
contoh hasilnya seperti ini,


kotaknya sebenarnya nilainya cuma 1 dan 0, perubahan warna kotak/cell tersebut memakai fitur Conditional Formatting bawaan Excel.


VB project, DLL library, dan file Excel silahkan download disini:

Semoga bermanfaat.. Terima kasih.
[Continue reading...]

Sunday, 3 June 2018

VB to Excel

- 0 komentar
Projek ini dibuat dengan latar belakang seperti berikut:

- punya aplikasi untuk monitoring beberapa nilai dari device/PLC/yg lain
- nilai-nilai yang dimonitor ingin disimpan ke file Excel
- punya source code projek dari aplikasi monitoring tersebut

Untuk menyimpan file ke Excel sebenarnya ada 2 jenis file yang bisa dipakai, yaitu:
> Comma Separated file (.CSV)
> Excel file (.xlsx)

Kelebihan dari file CSV:
+ simple
+ bisa dibuka dengan Notepad
+ bisa dibuka dengan Excel, walaupun format tampilannya tidak bisa diubah

Kelebihan dari file Excel:
+ format tampilan bisa diubah dan disimpan
+ bisa dikombinasikan dengan Macro/VBA/VBS/Formula dari Excel nya

Baik, mari kita mulai..
tampilan dari aplikasi nya adalah seperti berikut:


pada contoh di atas, aplikasi Monitoring yg sudah ada kita anggap hanya menampilkan 4 buah nilai analog. nilai-nilai tersebut akan berubah-ubah sesuai data dari alat ukur atau sensor atau RTU atau PLC atau sumber lain. pada projek ini kita simulasikan perubahan nilai-nilai itu, terdapat tombol Start/Stop Simulation untuk memulai/mengakhiri simulasi.

Pekerjaan utama kita ada pada group dibawah ("Save Log to"). Jika Anda membuka source code projek monitoring Anda sendiri, maka tahapan ini yang perlu diperhatikan. 
Tambahkan beberapa objek seperti pada tampilan diatas, pada group "Save Log to", juga tambahkan objek Timer (beri nama "TimerLog") untuk secara periodik menyimpan log ke file. Aturlah interval sesuai yang Anda inginkan, pada contoh ini kita atur di 1 second (1000 milisecond), pengaturannya seperti pada gambar berikut:

Saat aplikasi dijalankan, langkah-langkah operasionalnya adalah sebagai berikut: 
1. karena kita pakai simulasi maka pertama kita klik dulu tombol "Start Simulation".
2. pilih jenis file output yang diinginkan (CSV atau Excel).
3. klik tombol "Browse" untuk memilih file yang sudah ada atau menentukan folder file baru.

4. klik tombol "Start Logging" untuk memulai proses logging ke file.
5. untuk menghentikan proses logging, klik tombol "Stop Logging".
6. untuk membuka file output, klik tombol "Open File".
7. tampilan dari output file tampak seperi berikut: 

Demikianlah apa yang bisa kami sampaikan untuk kesempatan kali ini. Semoga bermanfaat dan Terima kasih.

 Source code projek VB nya silahkan download disini:
https://www.4shared.com/zip/o_H4H6GIfi/VBtoExcel.html


[Continue reading...]

Tuesday, 26 December 2017

Modbus RTU Chat

- 0 komentar
Chating via Modbus RTU network?
Here are the design and simple application


Tested using ModRS_sim and Visual Serial Port Emulator. Not yet tested with real Modbus RTU device.

please download here for:
source VB project: https://www.4shared.com/zip/gbW8e2X5ei/ModRTUChat_source.html
executable file: https://www.4shared.com/zip/wquCjVjlca/ModRTUChat_exec.html


Thank you.


[Continue reading...]

Saturday, 11 March 2017

Modbus Osiloskop

- 0 komentar
Sebenarnya sudah lama kami ingin post aplikasi VB ini, namun baru kali ini bisa kami share.
Aplikasi Modbus Osiloskop adalah permintaan dari seseorang dan beliau membayar kami untuk projek ini, jadi tidak akan kami share secara gratis source code projek VB nya, hanya aplikasi EXE nya.
Aplikasi ini berfungsi untuk membaca nilai dari register Modbus Serial (RS232), kemudian menampilkannya di grafik/chart. Chart nya bisa diperbesar (zoom in) dan diperkecil (zoom out).
Berikut adalah tampilan dari aplikasi tersebut:

Setting/konfigurasi nya:

Tampilan ketika dijalankan:

Untuk menjalankan aplikasi ini sebenarnya tinggal langsung PC nya dikonek ke device Modbus, sesuaikan setting Port dan alamat registernya.
Namun pada saat pengetesan saya menggunakan dua software ini: ModRS_Sim dan VSPE.
Penjelasannya sudah dijelaskan di artikel sebelumnya, namun sekilas saya gambarkan sebagai berikut:

VSPE
Virtual Serial Port Emulator, aplikasi ini berfungsi untuk membuat virtual serial port. Kita akan membuat 2 buah serial port yang secara virtual terhubung (Pair). Ini adalah tampilan dari aplikasi VSPE:

dan ini adalah koneksi Pair nya:

ModRS_Sim
Ini adalah tampilan aplikasi ModRS_Sim. Pilih protokolnya Serial.

Berikut setting portnya:

Ini adalah fitur ModRS_Sim untuk animasi/simulasi pertambahan nilai di register:


 Jadi seperti ini prosedurnya:
> buka aplikasi VSPE, buat koneksi Pair. pada contoh diatas port Com2 dan Com3
> buka aplikasi ModRS_sim, setting protokol ke Serial, setting Baud rate, parity, dll. pilih port Com2.
> buka aplikasi Modbus Osiloskop, buat file baru, buka tab Setting, Edit. lalu pilih port Com3, setting baudrate, parity sesuai dengan settingan di ModRS_sim. Tentukan alamat Register 1 sampai 3.
> dari aplikasi Modbus Osiloskop, jalankan dengan klik menu Action > Start.
> dari aplikasi ModRS_sim, tulislah nilai tertentu pada register yang sudah ditentukan, bedakan nilainya agar terlihat beda pada grafik, misal 10,20,30.
> kemudian dari aplikasi ModRS_sim, buka fitur Animation, laukakn penambahan 10 nilai setiap 1 detik, lihatlah ke grafik Osiloskop, setelah nilai di register lebih dari 100 maka ubah pertambahannya menjadi -10 agar kurva di grafik Modbus Osiloskop terlihat seperti gelombang sinus.

Demikian penjelasan kami.
Alikasi EXE Modbus Osiloskop silahkan download disini: https://goo.gl/3SYIhC
note: rename ekstensi file ke .zip

Untuk yang ingin membeli source code projek VB nya, silahkan hubungi kami via email.
Terima kasih.
[Continue reading...]

Tuesday, 7 June 2016

SerialComm : Serial Communication (Chat)

- 0 komentar
This simple VB.net project is for testing connection/communication between 2 serial port.


We will use VSPE (Virtual Serial Port Emulator) to create 2 virtual COM ports.


The steps for testing:
1. copy the EXE, so we have 2 application file
2. open both application
3. open VSPE, make Pair for COM3 dan COM4
4. set Port on one application to COM3 and the other to COM4
5. click button Connect on both application
6. write some text on Text to Send box
7. click button Send.


Please download the project here.

Thank you..
[Continue reading...]

Friday, 27 May 2016

My Simple OPC Web

- 0 komentar
Hello..

Today, I want to share: MySimpleOPCWeb project.
this is the web version of MySimpleOPCClient (please read the article here).

I use Visual Studio Community 2015 (its free). I am not sure, is it OK with other version of Visual Studio or not.

Here is the design form:


We will use IIS Express as local web host, so make sure IIS Express is already installed on your PC.
This is the setting of Web, please open the project properties.


I use Matrikon OPC Server simulation as OPC Server, you can read the operation steps in the article of MySimpleOPCClient.


You can download the source code of MySimpleOPCWeb project here.


Oke. Thats it. If you found some problem using this project, or you have a suggestion, please let me know..
Thank you very much.

[Continue reading...]

Thursday, 26 May 2016

Modbus RTU Simulation

- 0 komentar
Welcome..

Today, we will simulate and emulate, Modbus RTU Server (Master).
Imagine, we have a Modbus RTU device (PLC, Remote I/O, etc) connected to our PC through Serial (COM) Port.
then, let we change the device (hardware) with an application (software), we will simulate it. And also, let we change the COM port connection with virtual serial port.
Oke?
Oke. we will use Mod_RSsim for the first one (Modbus RTU Simulator), and we will use VSPE (Virtual Serial Port Emulator) for the second one (Serial Port Emulator).

You can download Mod_RSsim from here.
You can download VSPE from here.

Oke. lets go..!

Now, we will configure the virtual connection of serial port :
- open VSPE application

- goto menu Device > Create


- select Pair, then click Next


- select unused (undefined) Port, example COM3 and COM4, then Finish


- the Emulator has started


- dont close the application, minimize is Ok.


Now, we will open Mod_RSsim application as Modbus RTU Master simulator :
- open Mod_RSsim

- select Port to MODBUS RS-232


- click on port icon to open the port setting


- select the type of I/O


- to write Digital Input or Coil Output, just double-click on the register


- to write Holding Register or Analog Input, double-click on register then write the value on the box


Oke. The next step is testing with Modbus RTU Client. We can use the simplest sample application from this blog: Modbus RTU Sample VB6. 
Actually I develop new (advanced) sample project for Modbus RTU client, maybe I will post here someday.


Thats all.. Thanks for visiting..
See you next time.. :)
[Continue reading...]

Wednesday, 30 March 2016

My Simple OPC Client

- 36 komentar
As request from our friends, here we create a simple VB application/project to communicate with OPC Server.

Previously, we create My OPC Client project, the latest is version 5, with some advanced feature. But some friends need more simple application, so we create this project. The purpose of the application is to connect to OPC Server, Read data and Write data. So here is MySimpleOPCClient..


For testing, we use Matrikon OPC Explorer, you can download from here.
Please download MySimpleOPCClient project source code from here.


The steps:
1. Run Matrikon OPC Explorer
2. Create group, and add some items to monitor, ie "Bucket Brigade.Int1"
4. Run MySimpleOPCClient
5. Write "Matrikon.OPC.Simulation.1" on OPC Server Name textbox
6. Click Connect button
7. On OPC Item textbox, write "Bucket Brigade.Int1"
8. Click on Add Item button
9. The value of item is automatically loaded to the Read Value textbox
10. Try to write new value on Write Value textbox, then click on Write button


Note: 
Before opening the project, please make sure you have OPCDAAuto.dll installed/registered on your system. Please follow these steps to register the DLL:
> download DLL from here
> copy file to /System32 folder
> open CMD (command prompt)
> write this command: "regsvr32 OPCDAAuto.dll"

We create this project with MS Visual Studio Express 2010, and we targeted to .NET Framework 4. If you get some problem, please let us know.

See you next time.. Thank you...
[Continue reading...]
 
Copyright © . HadiSCADA - Posts · Comments
Theme Template by BTDesigner · Powered by Blogger